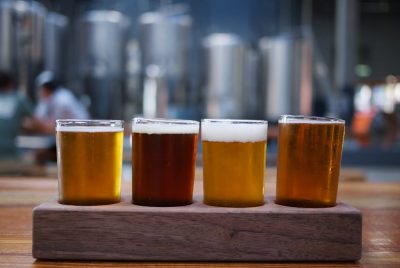
If you frequent brewpubs, you’ve most likely heard of the term “beer flight". However, if you’re…
Home Brewing Kit Guide: Make Your Own Bad Ass Beer
So, you are ready to try brewing beer.
You have found tasty-sounding online recipes, watched helpful tutorial YouTube videos, conducted hours of research on Google, and are ready to get your hands dirty.
But before starting, you need the right equipment – of course. You do not have to have the large vessels those large breweries use to do all the work, but you do need a beer kit to get you started.
You can buy the pieces of these kits separately, or you can buy an already packaged home brewing kit.
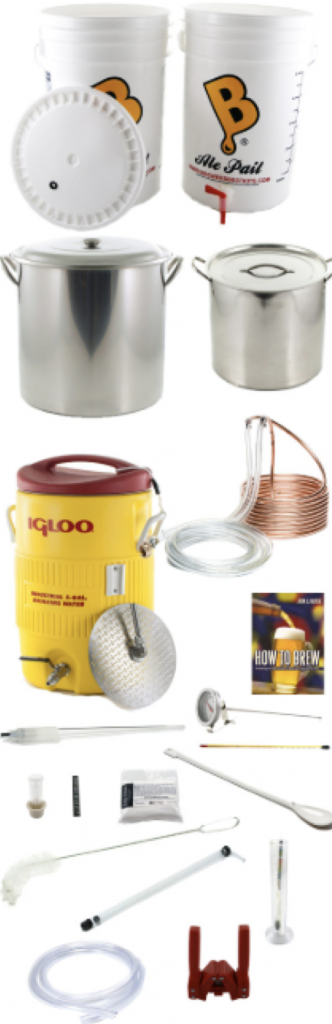
Beginning Homebrew All Grain Kit #6
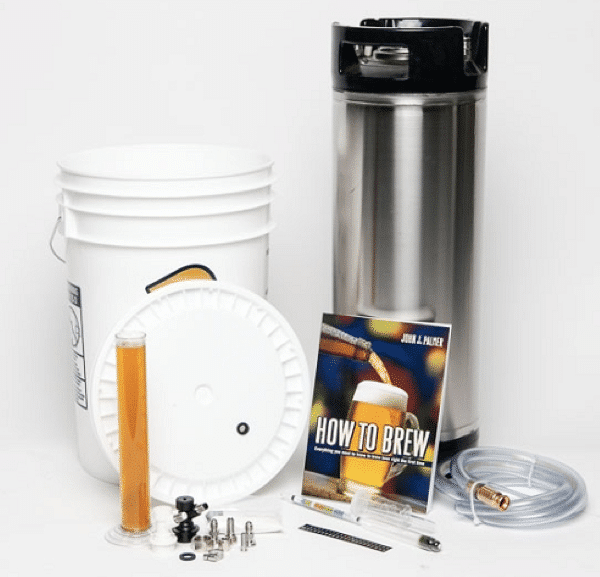
Beginning Homebrew Kit #8
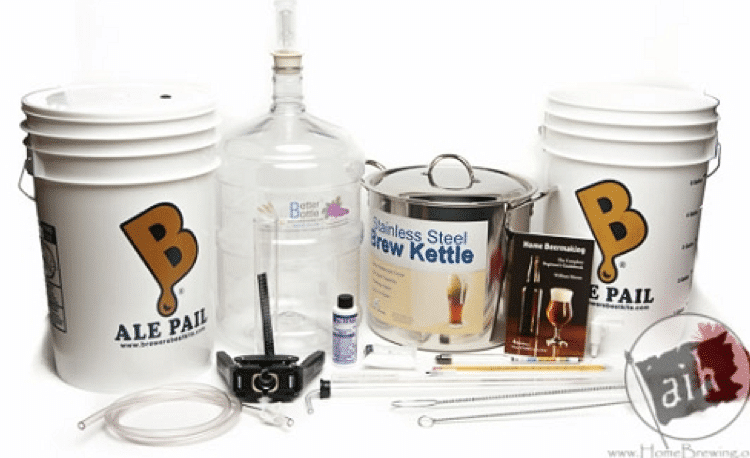
Brewer’s Best Beast Equipment Kit with Plastic Carboy
Coopers DIY Kit
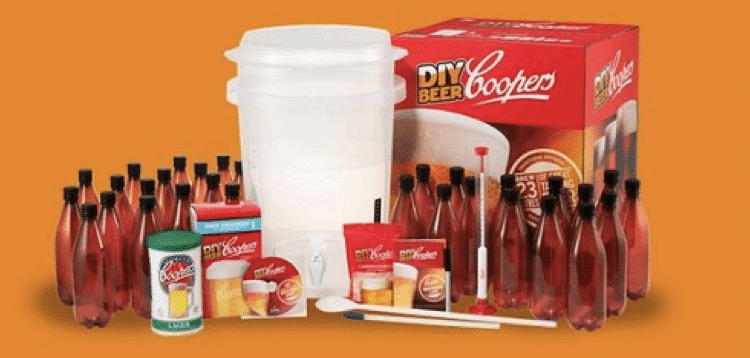
These beer making kits take a lot of the guesswork out of brewing beer at home. However, you could have more creative freedom by making your beer brewing kit from scratch.
What You Will Need
Time to get started on your home brewing kit! The following items are all available at homebrewing.org. Click one of the suggested products or search for something you prefer more on Homebrewing.
You will need the following items:
- Grains (any type you prefer)
- Hops
- Cleaner / Sanitizer
- Mash Tun
- Brew Kettle / Brew Pot
- Fermenter
- Airlock / Venting Plug
- Temperature Gauge
- Racking Cane / Auto Siphon
- Bottles
Ingredients
Ingredients are a must-have. Luckily, beer has only four main ingredients; so, you do not have to shop far and wide to obtain the components of this drink.
First, you will need grains to make the malt of the beer.
The grain or grains you use will create the glucose or sugar. Choose the appropriate grain, depending on the type of beer you are going to brew. For example, barley is the typical type of grain used, but so might wheat or other types of grains.
Next, hops will create bitterness in the beer. It balances out the taste, so it is not too sweet.
Of course, you also need yeast. The yeast is what makes the alcohol content. It also introduces CO2 during the fermentation stage.
Finally, you unequivocally need a good water source!
You may want to begin with a recipe kit before playing around with different ingredients on your own.
No-Rinse Cleaner and Sanitizer
You will need to clean your equipment before and after each brew. A no-rinse cleaner and sanitizer is the best cleaner you can buy for your home brewing kit.
These kinds of cleaners are safe to use on most surfaces, so they are perfect for your brewing equipment. They sanitize quickly and kill all germs and bacteria.
Lauter Tun (or Mash Tun)
The lautering process happens when the brewer (that’s you) removes spent grains from the wort. This process is also the time to produce glucose.
On the bottom of a lauter tun, there are slots. These slots filter your wort going through the mashout process, and some lauter tuns have temperature gauges attached, which will help you track the temperature during this process.
Brew Kettle (or Brew Pot)
The brew kettle is an essential piece of equipment for brewing beer. Use the brew kettle to boil the wort. This stage is when you get to add the hops and other flavorings.
They build a brew kettle to withstand high temperatures for a long period.
You will also want to check out the size. The more beer you want to make, the bigger your brew kettle should be.
A large headspace is important too, which will prevent the wort from boiling over and out of the brew kettle.
Fermenting Container (or Fermenter)
Fermenting is the stage that creates the alcohol and determines its strength. The yeast changes the sugar in your wort to both ethyl alcohol and CO2 (carbonation).
Your fermenter needs a tight lid. No air should come in or escape from the fermenter.
When you are checking out these fermentation containers, pay attention to the size. If you want to brew a big batch of beer, you may need a larger container for your beer to ferment, just like with your brew kettle.
You can use a hydrometer to measure the gravity and sugar density in the wort.
Airlock (or Venting Plug)
The airlock is like a plastic tube, but it is in a strange shape—the airlock tube inserts in the top of the fermenting container.
The airlock lets the CO2 leave the fermenting container, but it prevents any outside contaminants from getting inside.
Temperature Gauge
Temperature gauges help you to perfect your beer. There are critical times when the temperature of your wort or yeast must be right.
If you want to achieve the ultimate perfection in your brewing process, your temperature gauge needs to have high accuracy. In essence, you do not want to grab a cheap-o gauge. However, you do not have to spend a fortune either.
Racking Cane and Auto Siphon
Racking means to move liquid from one container to another.
A racking cane is a tube used to move or siphon the beer from one container to another.
Auto siphons are also tubing that siphon beer from one container to the other.
The difference between the two may not be clear, but there are small, subtle differences.
The main difference is how they work and how you use them. Auto siphons are a bit easier to operate than racking canes.
Bottles and Caps
Last but not least, you will need bottles and caps for bottling your finished beer brew.
Brown bottles protect your beer from UV light rays. Sunlight can skunk (or ruin the taste) of your beer. Feel free to substitute brown glass bottles with other darker-colored glass bottles. However, avoid clear bottles at all costs.
Accidents do happen, which is why heavy-duty glass bottles are something to consider since they do not break easily.
Not to mention, sometimes the pressure of the carbonation can be too much. You do not want the carbonation busting through your bottles. It has happened, and it can happen to you.
If you think that you will brew beer often or making a lot of beer at once, then you may want to invest in a bottle filler, bottling bucket, and a bottle capper. All will help you speed up the bottling process.
A few other questions to ask yourself:
- How much beer am I making? And what size of bottles do I need (or want) to accommodate it?
- What type of caps do I want? There are a few choices. Bottles that have grooves need caps. There are also twist caps, or you can go old school and get bottles that need corking. Rounded off lips on bottles use corks to close.
If you are making large batches, do not rule out using kegs instead. A keg can hold more, and it is a lot less work than having to fill several bottles.
Conclusion
Home brewing kits can have different equipment depending on the type of kit you buy and the brand. These are the basics that every homebrewer needs to get started, but for more help, click here to visit How to Make Your Own Beer at homebrewing.org.
You will see that the best part about homebrewing is experimenting with different types of grains, hops, and added flavors to find out what you can create.
Make homebrewing fun!
Want to know more? Check out our article on the process of making beer.
More to Explore


This Post Has 0 Comments